Signature Botanicals with Esther
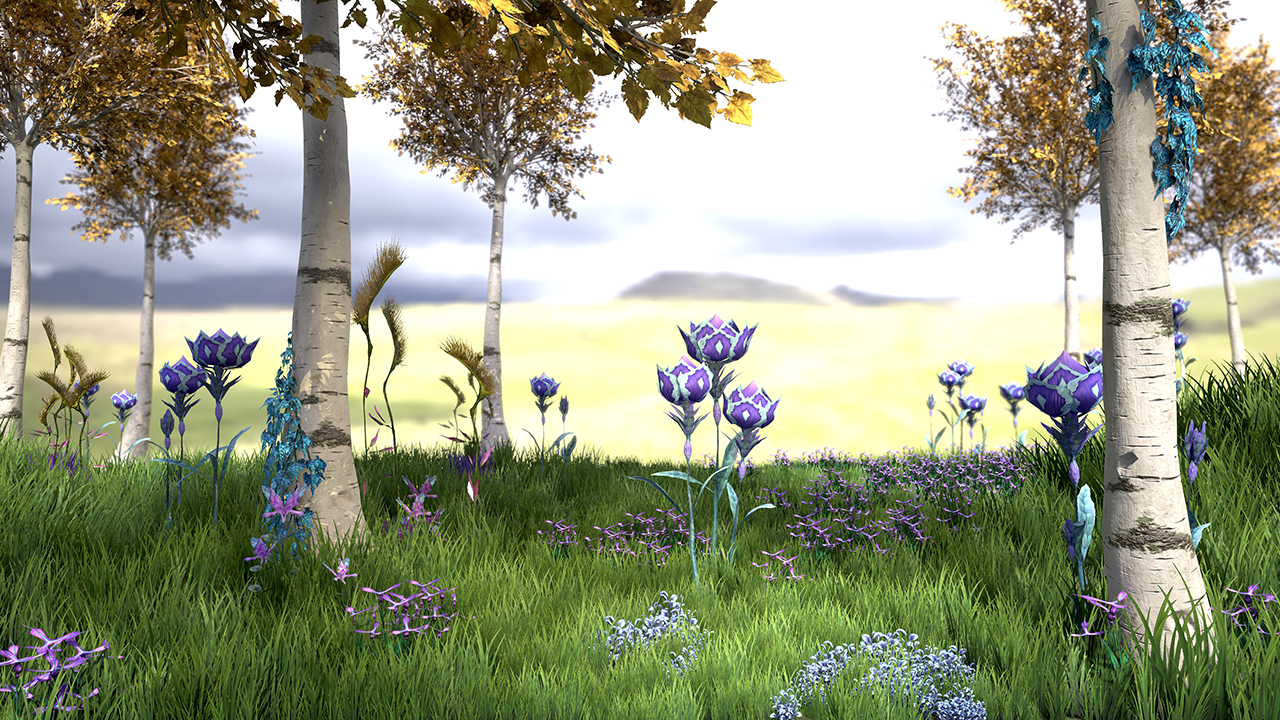
In creating the world of Terminus, especially due to its uniqueness with planar collisions causing fractures and wild climates, it is important to include highlights, both big and small, that surround the player creating a feeling of uniqueness within the current space they inhabit. Whether traveling in the larger-than-life environments of Wild’s End or through the hills and ledges of Thronefast, the small details in the foliage and surrounding botanicals must paint a picture that helps the player understand the part of the world they are traversing. We want the parts of the world to feel special and unique, to create lasting memories. Whether to paint a dark and dim swamp like area, or to bring to life the vibrance and beauty of another, these touches of detail cannot go overlooked. To add to that, it creates a moment of awe when perhaps an element that lives native to an area you frequent, pops up unexpectedly in other areas of the world. This creates character for our civilizations that define them across the world.
In this article, we take a look at the process of creating signature botanicals, highlighting the Thronefastian Kingsbloom. Led through this journey by 3D Environmental Artist, Esther Shin, we give you a glimpse of concept to reality and everything in between. While there can be some complicated terms and processes, we break it down for everyone to enjoy and understand. So, without further delay, here is a look at her process.
Concept Art, Inspirations, and Research
Hello everyone, let’s get to it. I start by coordinating with the concepts provided, and then dig a little deeper to find real world references. However, there are times where I’m tasked with creating something completely fantastical like the Thronefast native Kingsbloom, as an example. Being able to hand sculpt a new species of foliage has its pros and cons. As exciting as it is to play mother nature, making something that does not exist calls for some creative problem solving.
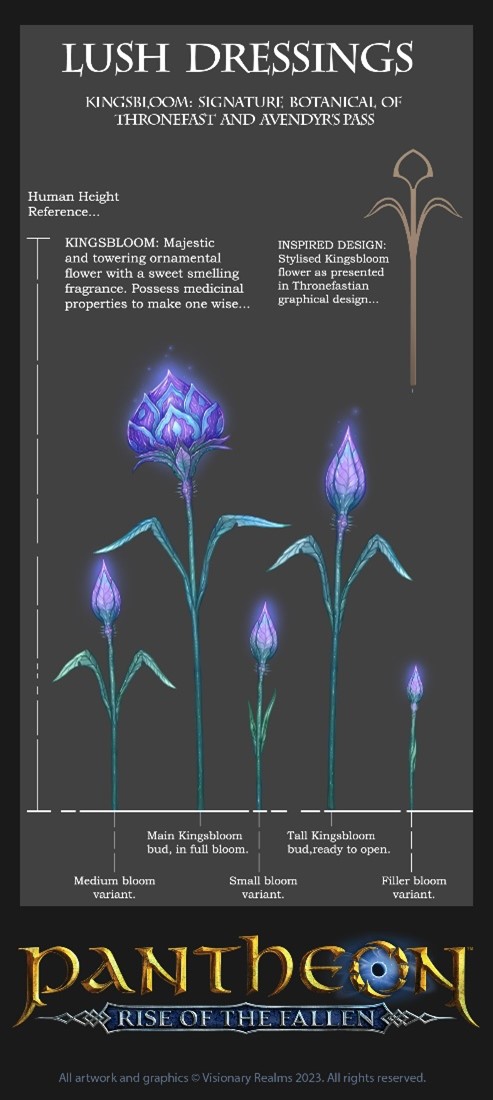
Before diving into Zbrush to start the handcrafting process, I like to lay out a game plan. For something like the Kingsbloom this process started with me reverse engineering the design. Picking apart the components like the: stem, leaf, petal, and the bulb. I take note of all the individual assets I need and proceed to sculpting.
Below is an example of the starting concept art from our lead artist Jared Pullen.
 |
Onto Hand Sculpting with Zbrush
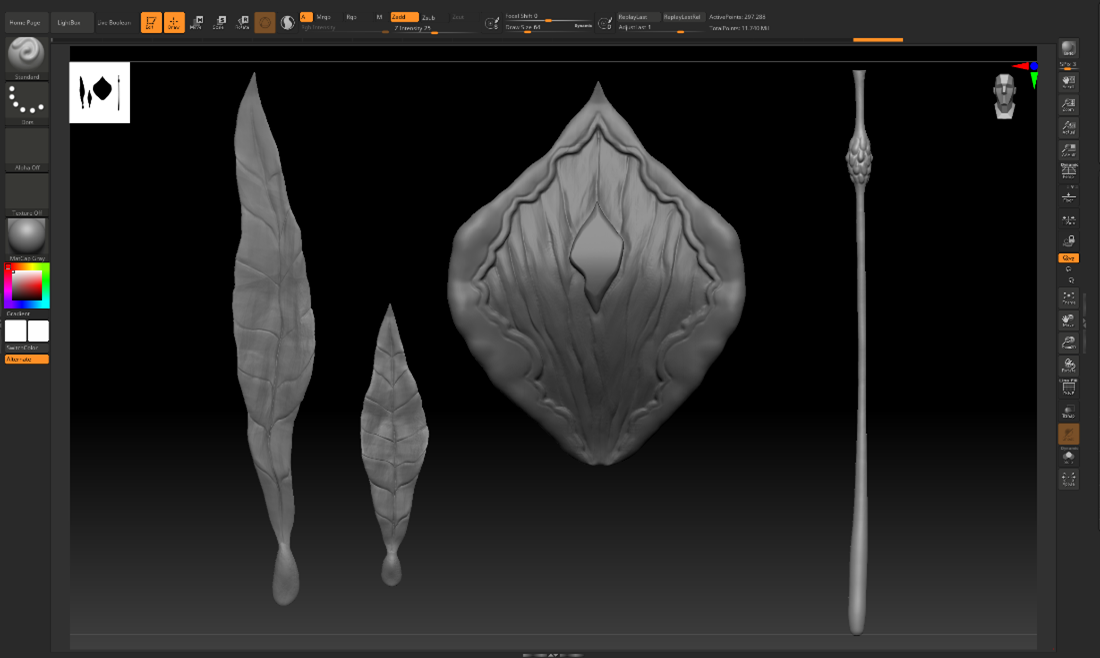
Now that I know what I need to be creating, I dive right in and launch Zbrush, while sweet talking it in hopes that the program cooperates with me for another day. For those that are reading the word Zbrush for the first time – Zbrush is a 3D sculpting program. It is used by many different kinds of digital artists that mimics traditional sculpting to create high resolution models for illustrations, animations, or in our case normal maps and height maps.
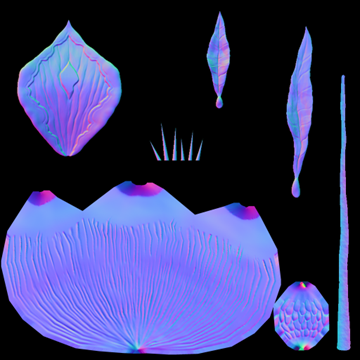
After completing each piece needed to build the Kingsbloom, I lay them out on a fitted resolution of 1024×1024 making sure that there is enough of a margin between each piece. I then render out the normal map from Zbrush to export. Below you can get a visual look at the process for the Thronefastian native signature botanical.
 |
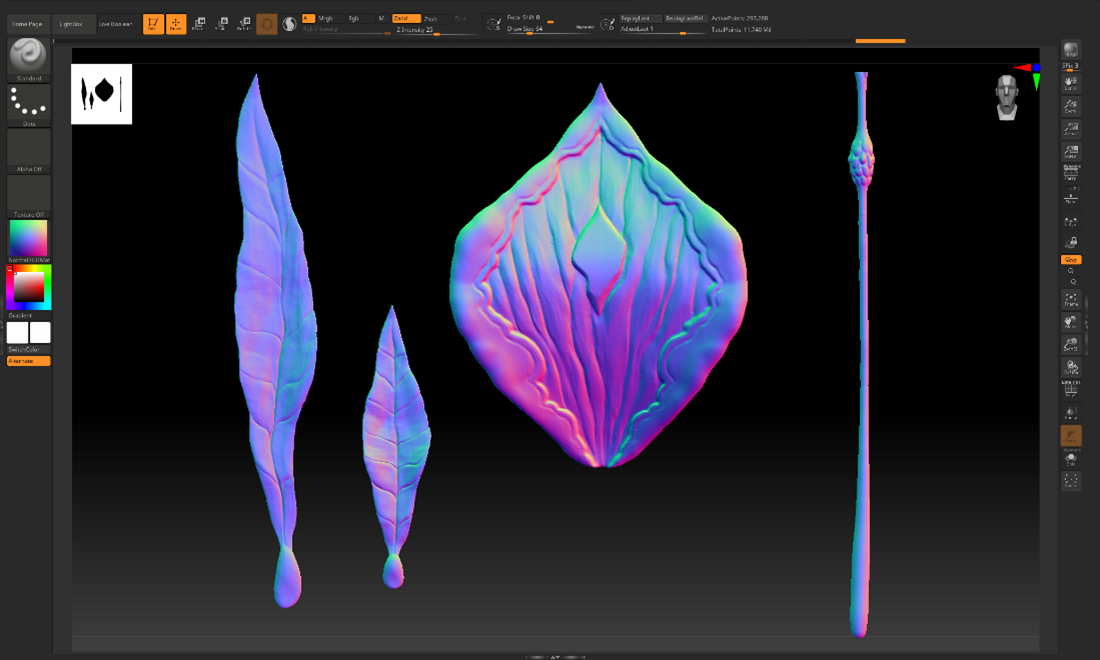 |
A normal map is a texture map that determine how an object will be receiving light to give an illusion of depth and height, an important detail for how the object interacts within the game world.
Once the needed textures are exported and looking good, I then move onto Photoshop to create the base color (aka diffuse map). Some plants are then colored in Substance Designer but for something more fantastical my go to is Photoshop. Using the exported textures as the guidelines, each piece is given lots of love and care to grow into a beautiful plant.
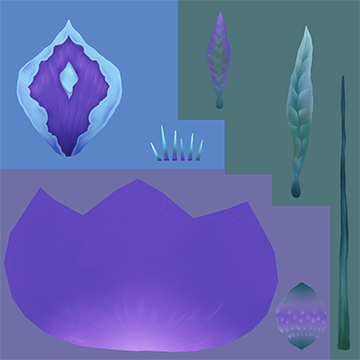 |
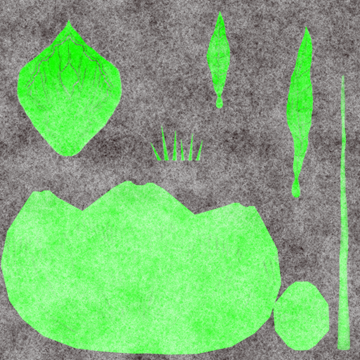
After the diffuse map is completed, I then create an alpha mask – an Alpha mask is a black and white mask determining which portions of the texture will be opaque and translucent – for the components that will be turned into cards.
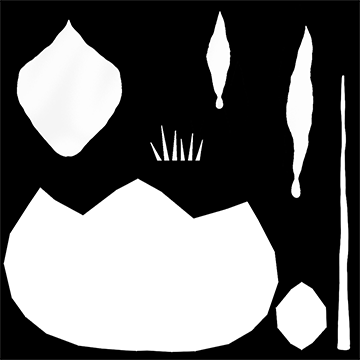 |
Now that the base color and alpha mask is complete, we move onto another program called Substance Designer. Substance Designer is a program used to create textures through a node-based structure. You can see an example of that below.
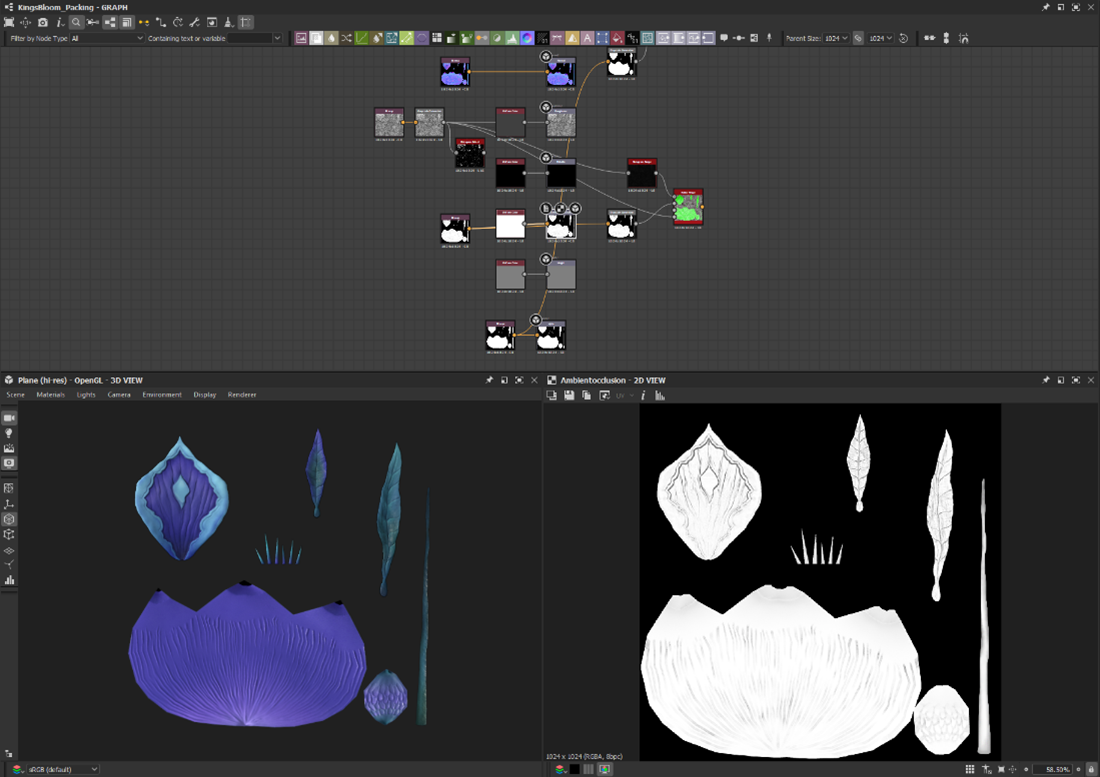 |
This is where the rest of the textures are generated using the sculpt render and the normal map as its base. Ambient occlusion, aka AO – AO, is the dark contact shadows within cracks and crevices. It is generated along with the roughness and height/sub surface map. Roughness is the black and white map that determines how wet/shiny the object will be. A height/sub surface map is a black and white map that will determine how thick the object is to allow for light to pass through it.
After all the needed maps are created, I check my list, twice even, making sure everything is in order and proceed to pack the different textures into channels. Channel packing is when you put a different black and white mask in each of the R, G, B, and A channels respectively. This makes it so that a single file can host 4 different sets of texture information. In our case, we combine the diffuse map and the alpha mask together and the AO, roughness, and height together so that the output is only 3 different texture maps.
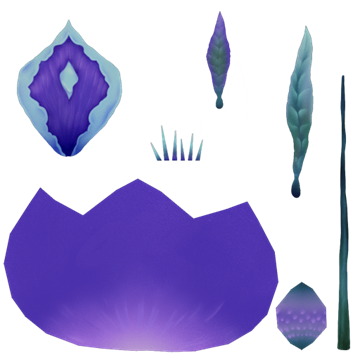 |
 |
 |
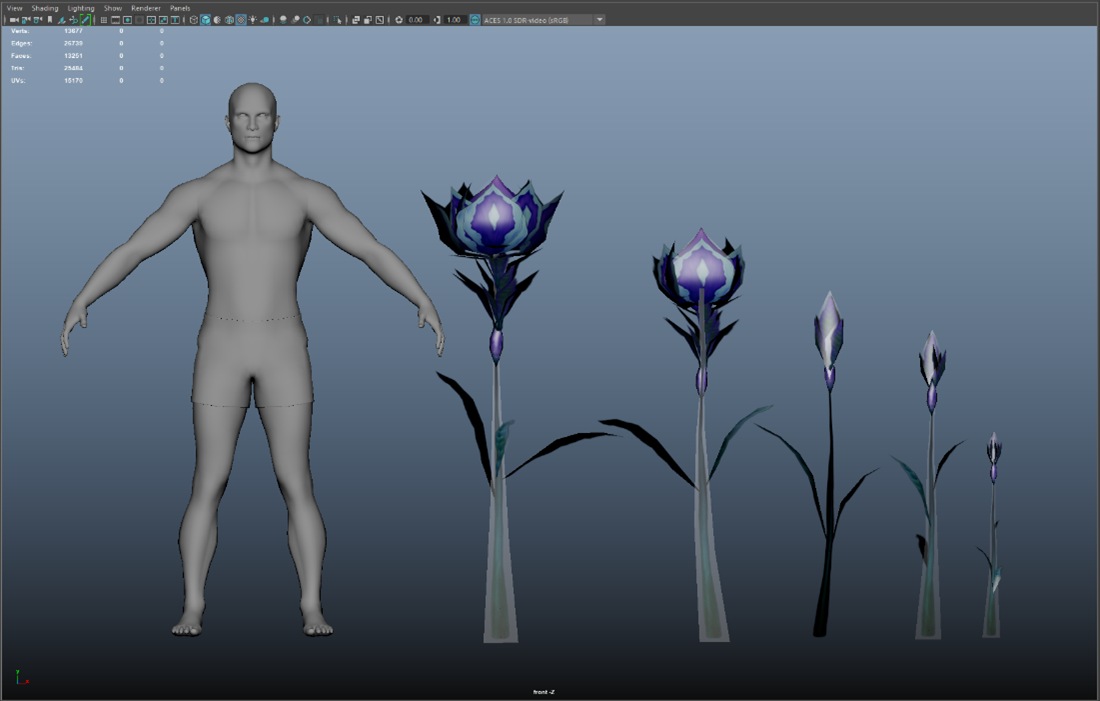
Once all the materials are completed, I then boot up good ol’ Maya. Maya is a 3D modeling and animating software which, in our case, will be used to strictly 3D model. Following the texture, I’ll proceed to create the low polygon model. The goal here is to use the least number of triangles (tris) as possible but to use enough to show off the details that are needed in the model. This is to ensure peak performance.
Next, I reference the concept art again to follow the scale and see what other variations are needed. In the case of the Kingsbloom, I chose to create 2 different larger adult blooms and 3 different saplings to create a growth chart. This allows for variety in the world while set dressing and gives more history to the plant detailing where it came from. This also aids in creating a more blended environment due to the taller nature of the Kingsbloom. Just like in your high school art class, the rule of thirds and composition are heavily used in 3D environments. Foliage elements also follow these art principles and they are categorized as either small, medium, or large. A blended environment will consist of all 3 sizes ranging in different shapes and colors, creating both areas of dense noise and rest to create a stronger composition.
 |
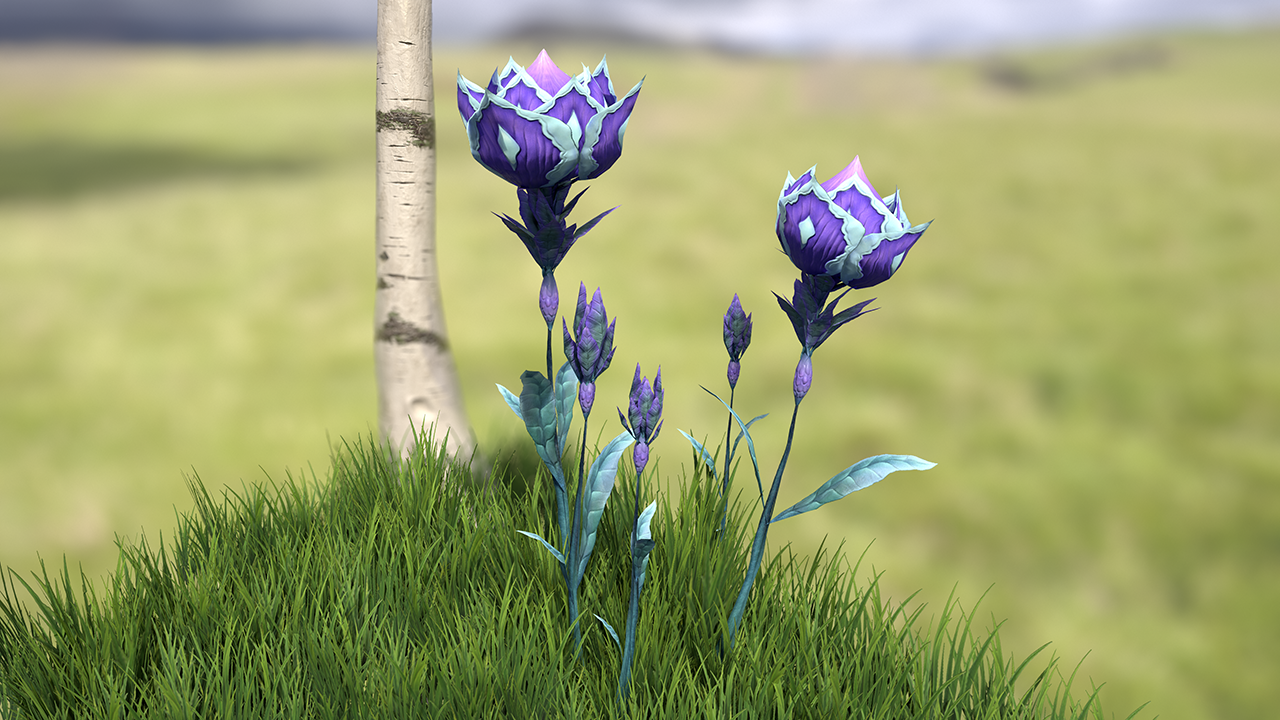
When every individual leaf has been placed exactly where it needs to be, the model is brought into engine where the materials are put together and made game ready. It’s an exciting process that helps bring the world to life, and I’m excited for you to see the Kingsbloom in game in all its glory.
A Kingsbloom is Born
Thank you to Esther for her walk through creating the beautiful Thronefastian Kingsbloom. We hope you’ve enjoyed this look at the inside process on how these things come to life, as well as the care put into them. You can see Esther and the art team hold themselves to a high standard, and we believe this shows the bright future that is in store for Pantheon. Onward and upward!
 |
| Producer’s Letter | Month in Review | Developer Feature | Community Feature |
|---|